
No-knead to worry
Although the kneading of dough is one of the most familiar and distinctive images people associate with making bread, it doesn’t have to be part of the process at all. So-called ‘no-knead’ recipes dispense entirely with this input of labour, whether human or mechanical.
The Scottish nutritionist, author and campaigner Doris Grant invented her no-knead ‘Grant loaf’ in the 1940s, allegedly by accident, and popularised it in her book Your Daily Bread. Grant’s recipe used sugar or honey, a larger-than-usual quantity of baker’s yeast and a very wet, soft dough to produce a loaf that didn’t require kneading but that could be knocked together and baked within a couple of hours. Typically made in a tin, Grant loaves don’t usually rise as much as their kneaded cousins and have a close, if not dense, texture.
In the last decade or so, a number of bakers have come up with no-knead recipes. Chad Robertson, Dan Lepard and Jeff Hertzberg and Zöe François have all developed an angle on bread made without the traditional period of kneading by hand or machine. Excitable journalists have sometimes described these techniques using words like ‘revolutionary’ and other such superlatives. That’s going a bit far. In fact, I think we can dispose of the idea that any single method of making bread is going to change the world of baking as we know it. No one technique can provide all the flexibility that a creative and adventurous baker needs. Ignore the hyperbole, though, and we can see that no-knead formulae have a place in the baker’s armoury of methods.
Jim Lahey of the Sullivan Street Bakery in New York published his version of no-knead bread in the New York Times in 2006, and it generated a good deal of interest among foodies on the internet. No, it’s not a game-changer – but it is an easy and reliable way to make bread that not only tastes good but looks impressive too. The idea is almost ridiculously simple: prepare a very wet (80% or more hydration as a baker’s percentage) dough, use a much smaller quantity of baker’s yeast than is usual with a straight dough, and let it ferment slowly for at least 12 hours. If you have ever used a pre-ferment before, this will sound familiar. The difference is that all the dough is prepared and fermented at once, whereas more flour and/or water is added to a pre-ferment to make up the complete quantity of dough.
In common with a number of no-knead techniques, Lahey’s method involves baking the bread inside a pre-heated casserole or similar closed, heat-retaining container. The container serves two functions. Firstly, it acts like a baking stone, providing a source of stored heat that maintains the high temperature that the dough needs in the early stages of baking, when the average domestic oven is outpaced by the rate at which the cold dough absorbs the heat it can produce. Secondly, it traps the moisture that evaporates from the loaf as it bakes, maintaining a humid atmosphere that keeps the surface of the dough soft and allows it to expand fully. Again, this is something most ovens are very poor at. This practice is essentially the same as the old technique of ‘baking under’ described by Elizabeth David, and one that has found commercial expression in products such as La Cloche.
The recipe on the Sullivan Street Bakery’s website helpfully gives metric as well as imperial measures.
430g flour
345g water
1g yeast
8g salt
That’s too much salt if you ask me or the World Health Organisation. I half it.
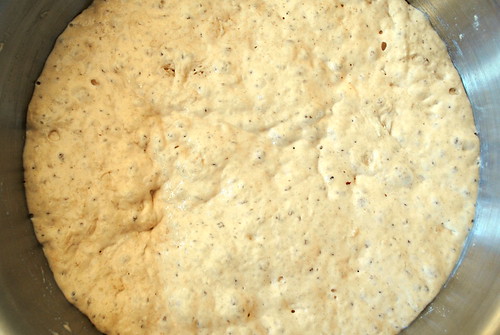
Just chuck all the ingredients into a bowl and mix them together with an implement of your choice. Once everything is thoroughly incorporated, cover the bowl with clingfilm, a plastic bag or anything that will prevent a skin forming on the dough. Now you can just leave it for about 12 hours. As with any slow-fermented dough, the exact length of time isn’t critical. It can be left quite a bit longer, or a few hours less if necessary. During this time the relatively small number of yeast cells will begin to reproduce and fermentation will gradually accelerate until the dough is as wobbly as a blancmange and full of bubbles. Now it gets a fold, a brief rest, and a two-hour rise before being baked.
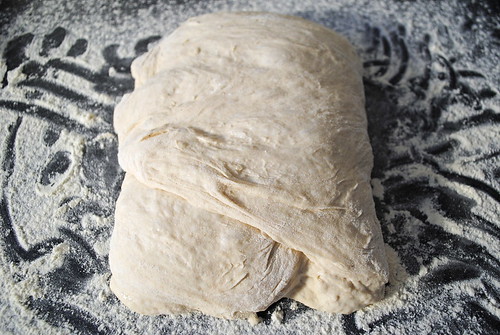
Ok, so it’s not actually that simple. The thing is, a dough hydrated to 80%+ is very sticky, and very soft. Really, it’s more batter than dough. You can’t just flip it out onto your worktop and play around with it. First of all, you need to very enthusiastically flour the worktop. Don’t be shy – there should be clouds of that stuff floating about. To turn the dough out, you really need a flexible-but-stiff spatula. One of my prized kitchen utensils is this Rubbermaid spatula. Functional rather than funky, but just about the best tool of its kind in my opinion.
Hopefully the dough won’t stick to the worktop, but you also need to flour your hands. It actually helps if your hands are slightly damp: I’ve got into the habit of running my hands under the tap, lightly drying them and then dusting flour over them. The flour clings on, making your hands that much more non-stick. Anyway, now you fold the dough like a letter, one third over the middle third and the remaining third over the top. You still need to handle the dough like a hot potato – prolonged contact will result in your fingers sticking to it.
Leave the dough to rest for a quarter of an hour. Now, Lahey’s directions are to ‘shape the dough into a ball’.
Well, you can try.
As I said, the dough is almost more like a batter. There is no way you are going to shape it into a ball or any other form. Lahey suggests placing the dough on a floured cotton tea towel to rise, which is ok, although if you have a banneton/brotform you are better off using that. Whatever you use, make sure you give it a generous coating of flour first. Once your proving container/surface is prepared, dust your hands with flour again and, with movements as swift and decisive as you can manage, scoop up the dough and deposit it in/on the banneton/tea towel. Don’t bother shaping it. It’s not necessary and will only result in frustration.
Just one thing – if you don’t have a banneton and are proving your dough on a tea towel, make sure you place the tea towel on something moisture-permeable like a wooden chopping board. If the dough can’t breathe, it will stick to the towel, no matter how heavily you flour it. If that happens, when you try to tip the dough into your pre-heated casserole (or whatever), it will tear, with potentially fatal results.
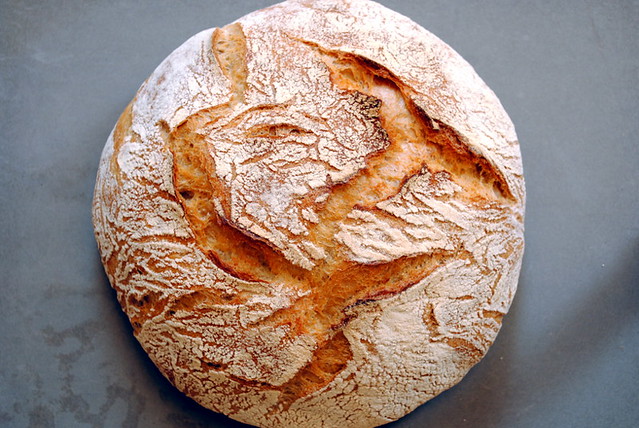
Let the dough prove for a couple of hours. In the meantime, pre-heat your oven to maximum temperature (240°c would be nice), with your casserole/whatever in it. I’ll leave it to you to work out how long it will take for your oven to reach screaming-hot, but I can tell you it takes mine a while. Once it’s up to speed, take out the casserole/whatever and quickly tip the dough into it. Replace the lid, chuck it in the oven, and give it half an hour before taking out your baking-container and transferring the – now mostly baked – loaf to a baking sheet, or even directly to the wire oven rack. After this it’s really a case of how well browned you want your loaf, so I would advise just keeping an eye on it and taking it out when you’re satisfied.
Lahey’s recipe works because time and water accomplish much of the work that kneading would otherwise do. We knead bread dough to develop gluten. In very simple terms, kneading is just very thorough mixing, which brings together more of the protein molecules that combine to create gluten. In dough that is left for many hours, the phenomenon known as Brownian motion causes the protein molecules to move around within the water that binds the flour, so that they come into contact and form gluten just as if the dough was kneaded. The more water the dough contains, the more freely the molecules move. It all happens slowly, and not as completely as it would if the dough was given a thorough workout, but it’s enough.
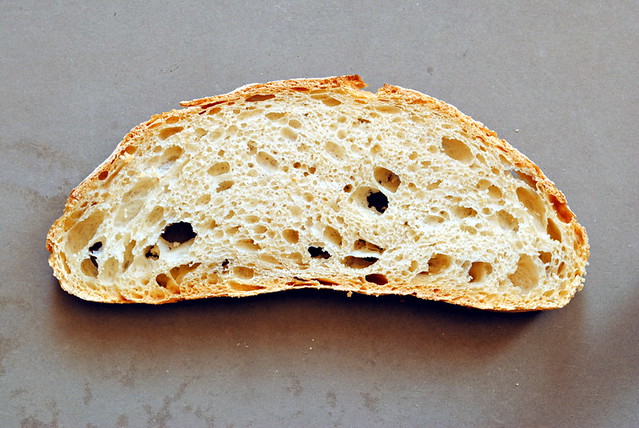
The dough, being so soft, is very extensible. When gluten is well-developed, it is also very elastic, meaning that it will resist the internal pressure of the gas that causes the dough to rise to some extent. The combination of a wet dough and the relatively low elasticity of the only partially-developed gluten produces the very open crumb that Lahey’s no-knead recipe produces, while the support of the container it is baked in prevents it from spreading out into a puddle.
I like the Lahey recipe and I use it fairly regularly. Of course, you are rather limited by the shape of your baking container, although you can use the method without it to make flatter breads like ciabatta. At any rate, for dramatic results from minimum effort, it’s hard to beat.